Make a Crane!
One of the most famous origami models is the paper crane. In Japanese folklore, the crane is said to live for a thousand years. Read on for simple instruction on how to make a paper crane, and take the WWT #CraneChallenge
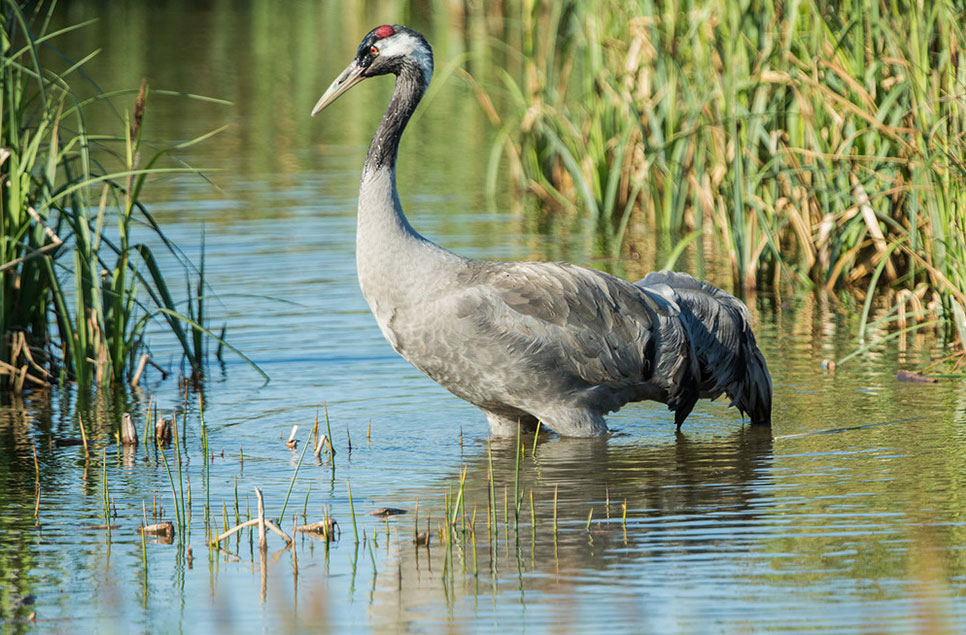
Have fun making a beautiful origami crane. In Japanese fairytales, the crane is said to live for a thousand years and it’s believed if you fold a thousand paper cranes, the gods will grant you happiness and good luck.
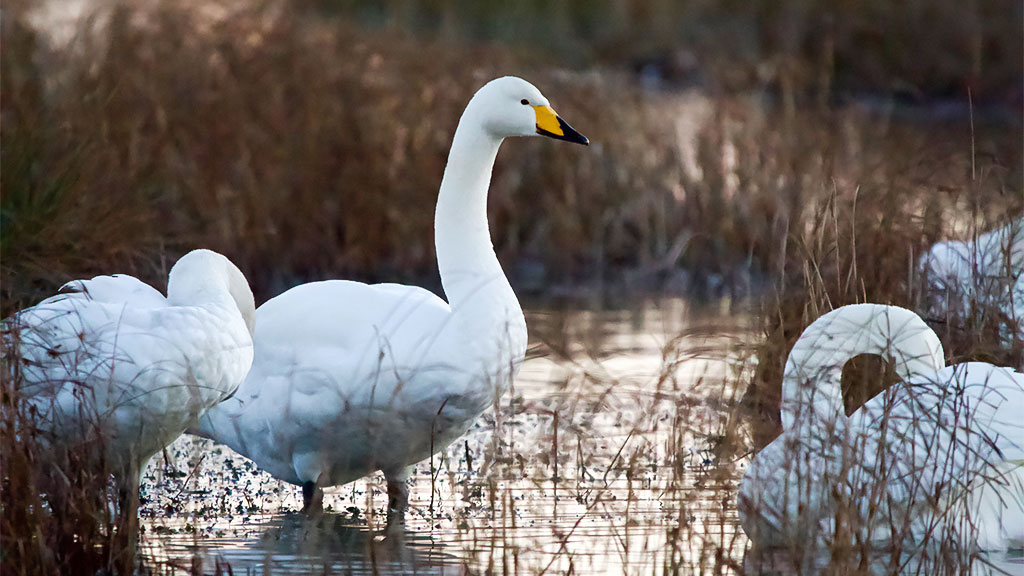
Cranes were once extinct in the UK, but since 2010 WWT has been re-introducing them to the countryside. 100 cranes have been raised at WWT Slimbridge, in Gloucestershire and released onto wetlands in Somerset.
Fun Fact: A cranes’ ‘bugle’ can be heard up to two kilometres away.
Back to the origami……follow these simple instructions to get started and soon you’ll be creating your own little bit of magic, transforming an ordinary square of paper into something wonderful.
So get folding!
Crane origami instructions
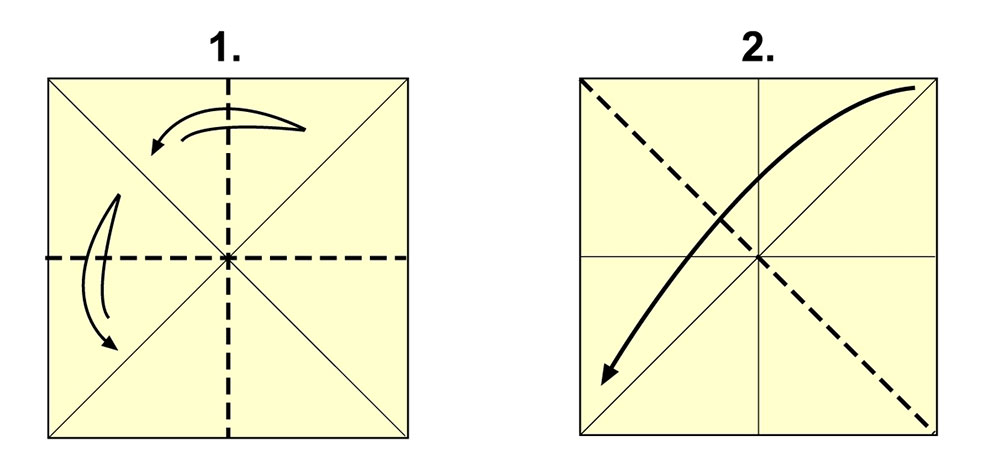
- The key below will help you to understand the arrows, which in general show the direction to fold the paper in.
- The arrows that have a shadow line underneath (like in step 1), mean you need to fold and then unfold, to form a crease
- The long single arrows (like in step 2) mean fold and keep folded
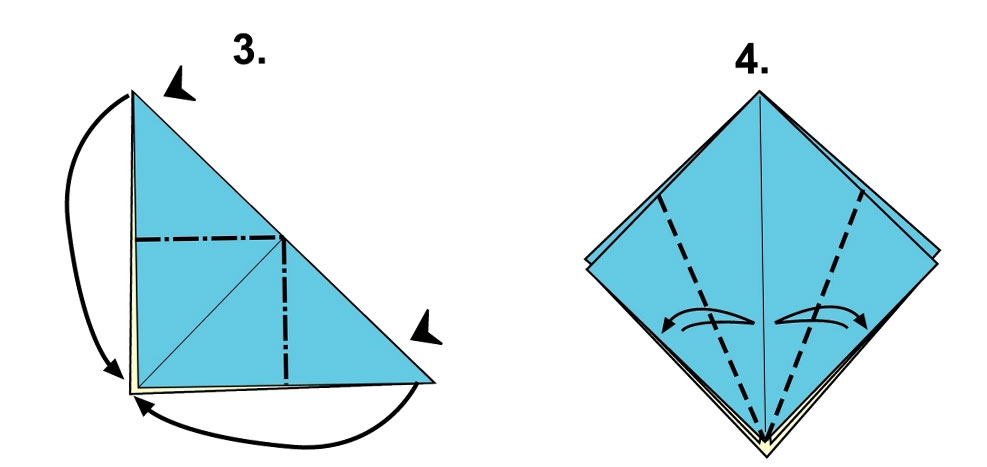
- The black arrow heads mean push in (step 3 and 5)
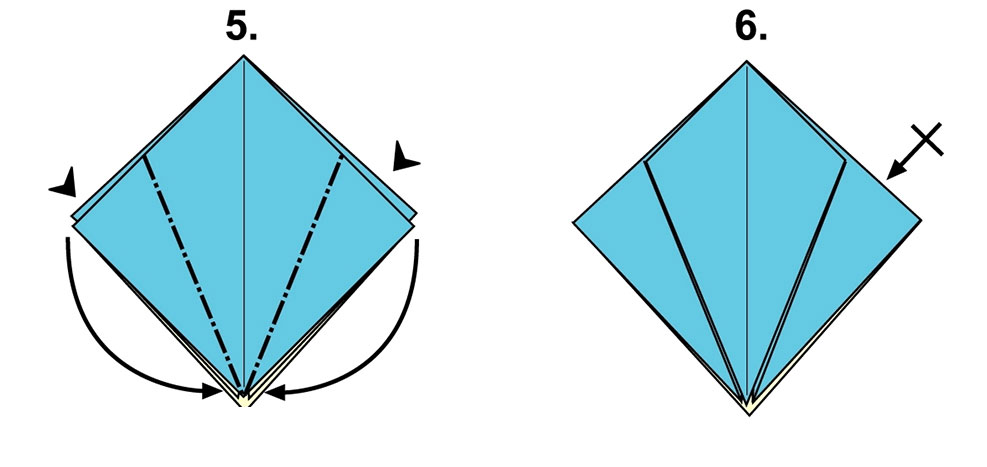
- The straight, short arrow with a line through it (so it forms a cross) means repeat here
- The short arrow head with a line through the paper (in step 14) means push in and fold here, in the direction of the arrow
Step by step instructions
- Start with a square sheet of paper. Fold and unfold the paper in half along the dotted and diagonal lines.
- Fold paper again across dotted diagonal line as shown (and keep folded)
- Take the top left corner and bottom right corner as on the diagram (by the small arrow heads) and push paper inside in direction of the long arrows, to the bottom left corner. You should end up with a square shape.
- Fold and unfold along both dotted lines on the front-facing side only (not on the back, you will get to that bit shortly!)
- Push in corners like in step 3 (where the two arrow heads are on the diagram in step 5) towards the centre fold along the crease you created in the last step.
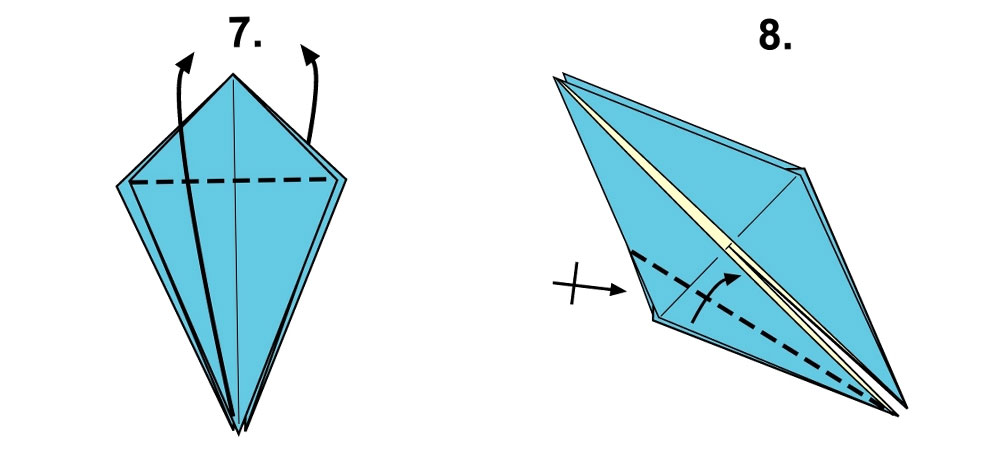
- Turn over the paper and repeat steps 4 and 5 on other side. You should end up with a kite shape as shown in step 7.
- Fold paper up in direction of arrow along dotted line. Repeat on back.
- Making sure you’ve got your paper the right way up to match picture, with the slit at the bottom, fold left-hand side to the centre along dotted line.Repeat on back left hand side.
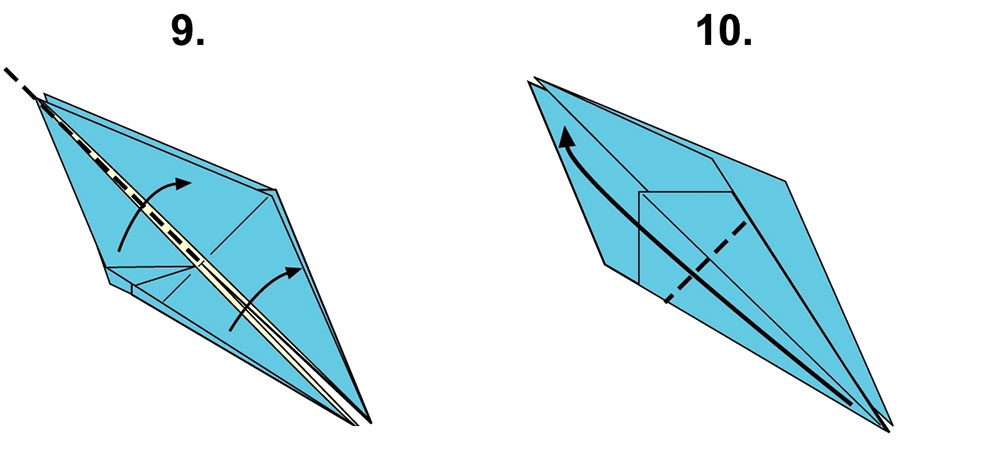
- Fold over front side only in direction of arrows.
- Fold up along dotted fold line in direction of arrow.
- Fold paper (just the paper fold created from phase 8) across in direction of arrow along dotted line.
- Flip the paper over and go back to step 8 and repeat steps 8 through to 11.
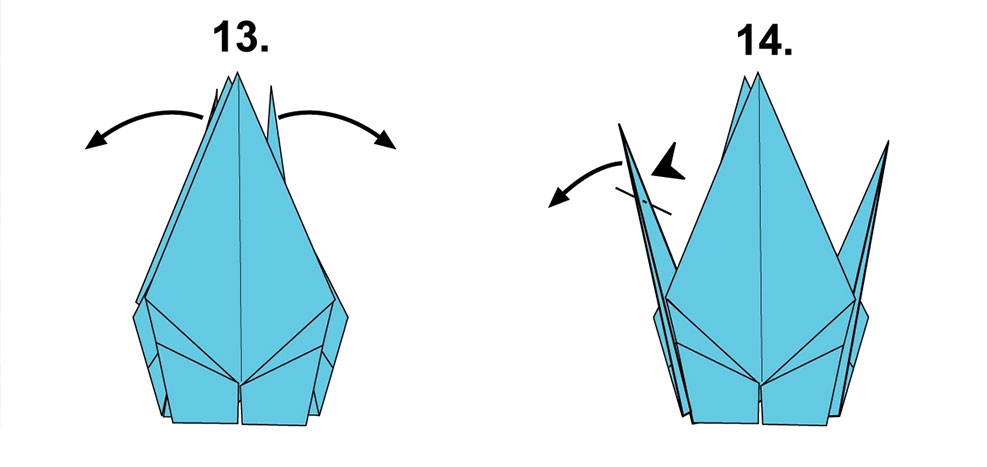
- Hold the bottom of the paper by pinching it at the bottom in the middle.Then pull the tips out and flatten them.
- Push down one tip into the centre fold and squeeze the top inwards to make the crane’s head.
- Pull down both wings along dotted line
- Pull out neck and tail to create the final crane.

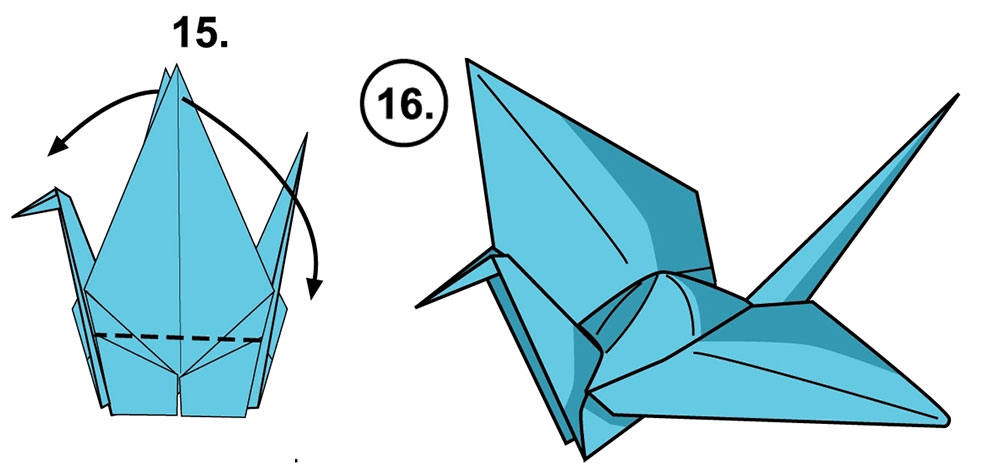
And hooray, hopefully you should have a crane that looks something like the final step in the diagram!
Top Tips
Make sure you really crease each fold. You might want to go over it several times with a ruler or fingernail to make sure it’s really crisp.
Try and be as exact as possible on each fold.
You will also want to make sure it’s completely flat after each stage.
A good tip is to always look ahead to the next step, to see what you’re aiming at and whether what you’re doing will look like the diagram in the next step.